
How to Redirect Users Based on Country or IP Address In WordPress
Need a way to redirect users based on country or IP address on your WordPress site? In this article, we'll give you a quick tutorial on how to use the Geo Redirects addon to easily send people to different parts of your website based on their country IP address.
This type of redirect comes in especially handy if you want to:
- Send people straight to the translated version of your site that fits their locale
- Use location-specific landing pages to increase your conversion rate
- Steer people away from content or products that aren't available to them
To set up these types of IP address redirects on WordPress, the Geo Redirects addon gives you a simple set of AND/OR conditions that you can use to easily redirect people based on specific criteria.
Table of Contents
How To Redirect Users Based On IP Address With Geo Redirects addon
To get started, you'll need to activate the Geo Redirects addon from GeotargetingWP settings.
Once you've got it activated, you can create your first redirect by going to GeoTargetingWP → Geo Redirects in your WordPress dashboard. Then, click Add New to create your first redirect and give it a title. The title is purely internal to help you remember what the redirect does.
Setting Up Your Redirection Rules
Now, let's get into the meat of the addon. Redirection Rules specify what conditions should trigger the redirect.
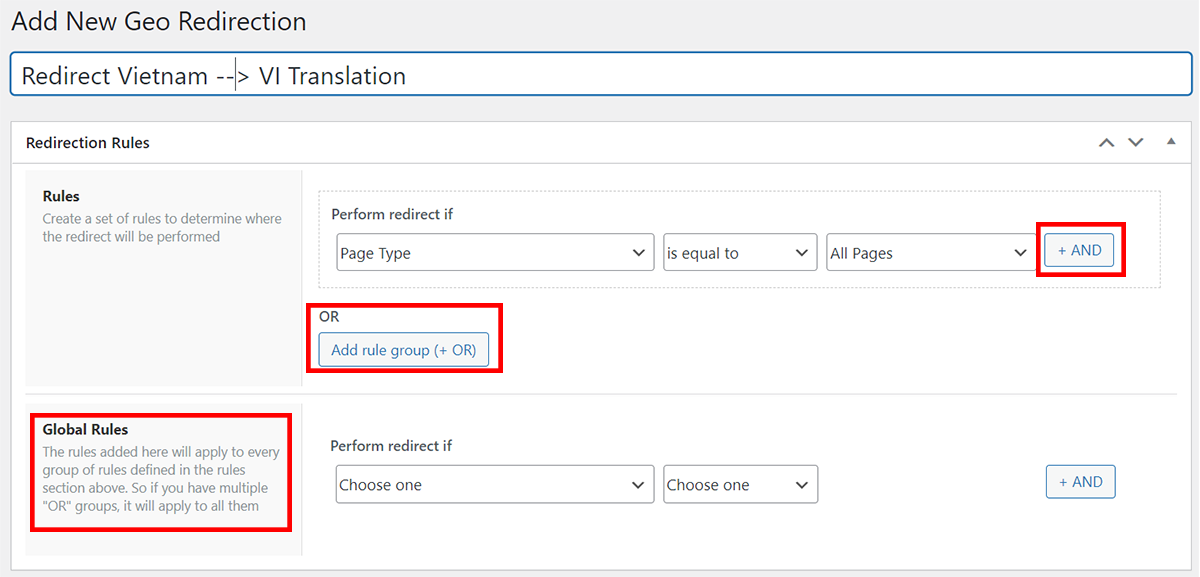
You can use both AND and OR conditions to create these rules:
- AND - the redirect will only trigger when all of the conditions are met
- OR - the redirect will trigger when any of the conditions are met.
You can also combine AND and OR rules. So you could trigger a redirect based on:
- Condition 1 and Condition 2 at the same time
- OR Condition 3 by itself
You can also nest multiple rules by using Global Rules. When doing this, the Global Rules will apply always as an AND in conjunction with each of the normal Rules.
You also have lots of conditions that don't involve geotargeting, which means that you can target your redirects to specific:
- Types of users
- Pieces of content
- Devices
- Referrers
These give you the flexibility to do things like:
- Redirect users from a specific country but only on one page on your site.
- Redirect users from a specific country but only if they're not logged in to your WordPress site.
- Etc.
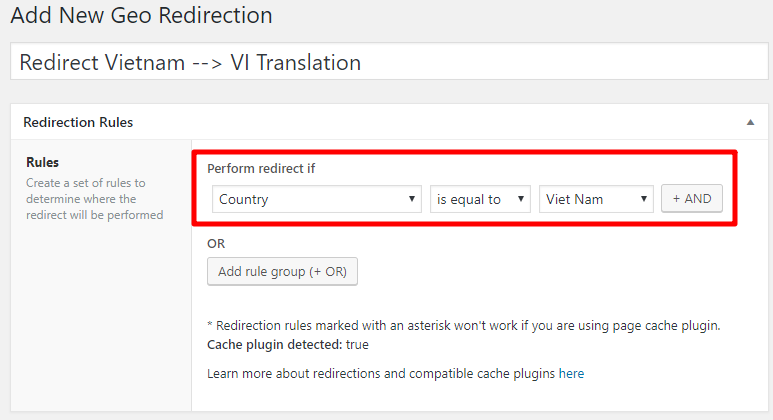
For this example, we're going to stick with a sitewide redirect to send users to the exact same page on the translated version of their site.
To do that, we create a rule for:
- Country is equal to Vietnam (or whichever country you want to target)
Configure Redirection Options
Now that you've chosen what triggers your redirect, you need to configure where your redirect actually takes visitors.
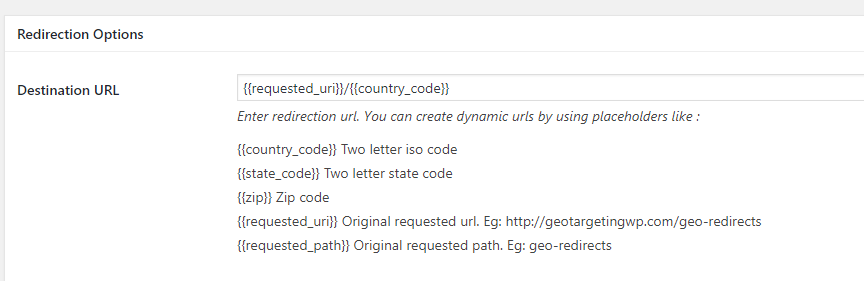
You do this in the Destination URL box. But this box is actually a bit more detailed than just pasting in a URL. If desired, you can also use placeholders to dynamically insert information for:
- Country, state, or zip code (these change depending on the actual location of your visitor)
- Original requested URL or path
For example, by using the country code and requested URL placeholders, you can send a visitor to yoursite.com/example-post straight to yoursite.com/example-post/vn for a seamless browsing experience.
You can see an example of this format below:
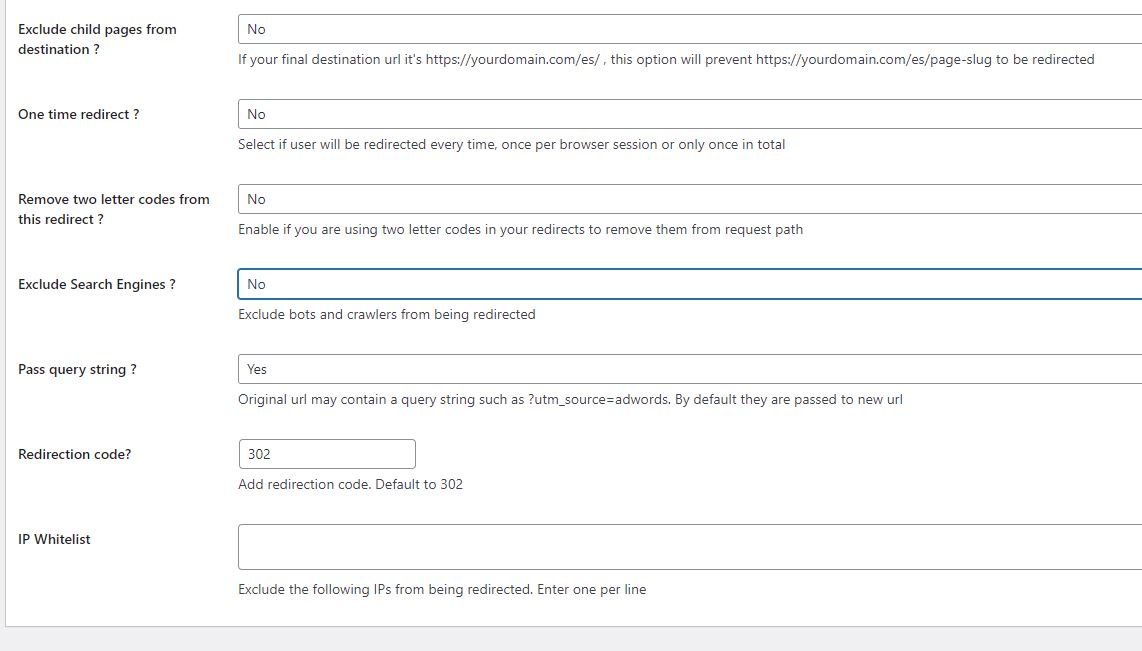
Below the Destination URL, you can also configure four more options:
- Exclude child pages from redirect? When this option it's marked, child pages of destination URL will be excluded from the redirect
- One time redirect? Choose whether to redirect visitors every single time, once per browser session or one time no matter what. In this example, we change it to YES to avoid redirect loops.
- Remove two letters codes from this redirect? Use this option if you redirect from two letter directories such as /uk/ to other two-letter directories using the {{request_path}} dynamic shortcode to automatically remove the code from the path.
- Exclude Search Engines? Lets you exclude crawlers and bots from the redirect.
- Pass query string? Query string parameter will be passed into the destination URL
- Redirection code? Let you change the redirect code if desired.
- IP Whitelist. Lets you manually exclude certain IP addresses from being redirected.
Once you finish configuring the settings, all you do is hit Publish and your redirect is live.
TIPS:
- If you are using dynamic urls and you want to redirect users every time without entering into a redirect loop you can set one display rule at the very beginning that states:
Page url is NOT equal to http://yoursitedomain.com/VI/*
This way that page or the childs will be excluded from the redirect - If you are simple redirecting to one page, be sure to add the page is not equal to destination url rule before your geotargeting rule.
Other Helpful Tips For Redirecting Users Based On IP Address
Beyond the core process outlined above, Geo Redirects also has a few other features that help you with your redirects.
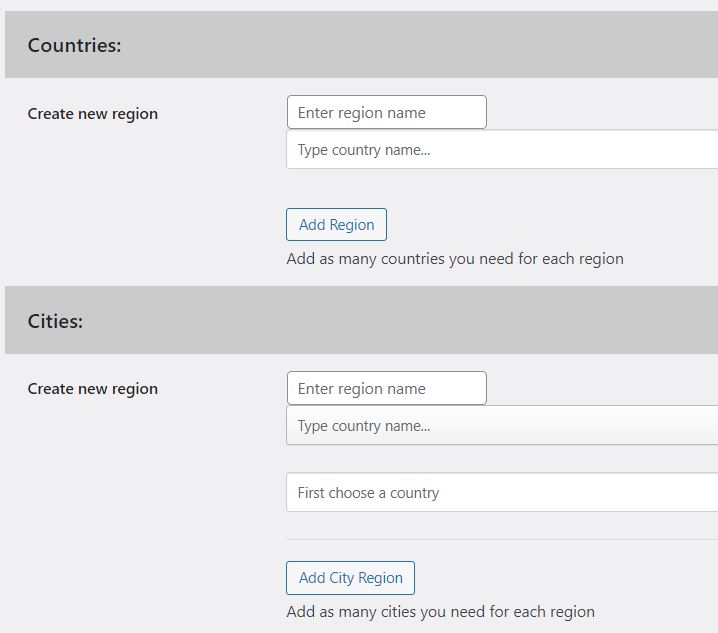
In the Settings area, you can create Regions. Regions help you save time by allowing you to group together certain countries or cities and target them with redirects as one unit:
Additionally, if you're experiencing issues with caching, you can turn on Ajax Mode in the Redirect Settings area to make Geo Redirects compatible with all cache plugins.
To get started with Geo Redirects, head here to learn more about the addon and download Geotargeting WP for your site.
Powered by Froala Editor