
How to Customize WordPress Content Based on Geolocation
We live in a global world. You don’t need me to tell you that - the fact that there are well over 3.5 billion Internet users is proof enough.
Why is that so important? Because it means there are bound to be situations where static content isn’t best serving the needs of your diverse visitors. That is, you might run into situations where you need to display different WordPress content based on the geolocation of your visitors.
That’s what this post is all about - I’ll show you how to customize WordPress content based on geolocation in a few different ways (you can click the link to jump to each method):
For the first three tutorials, I’ll use the basic functions ofthe GeotargetingWP plugin. And for the final tutorial, I’ll tack on the Geo Redirects addon.
Table of Contents
How To Show Different WordPress Content Based On Geolocation
One of the most common uses for geotargeting is displaying different WordPress content based on a user’s geolocation.
That is, all of your visitors go to the same page, they just see different content based on their location (in contrast to restricting access or redirecting users to different pages based on their location like I’ll show you later on).
This has a ton of different applications, some of which may be specific to your site. But in general, this method is especially helpful if you:
- Want to show different affiliate products based on a user’s location in order to maximize your commissions.
- Need to display different instructions based on where a user is visiting from.
To accomplish this, you can use the Geotargeting WP plugin. It’s fairly easy to get set up - but if you need help, you can consult the plugin’s documentation.
Once you have it installed and activated, here’s how to use it to customize WordPress content based on geolocation.
Let’s say you want to perform the following:
- Show Affiliate Offer A to all your visitors EXCEPT people from Vietnam
- Show Affiliate Offer B to all visitors from Vietnam
The easiest way to accomplish this is using the Geotargeting WP shortcode builder in the WordPress Editor. First, select the text/code for your first affiliate offer and open the shortcode builder:
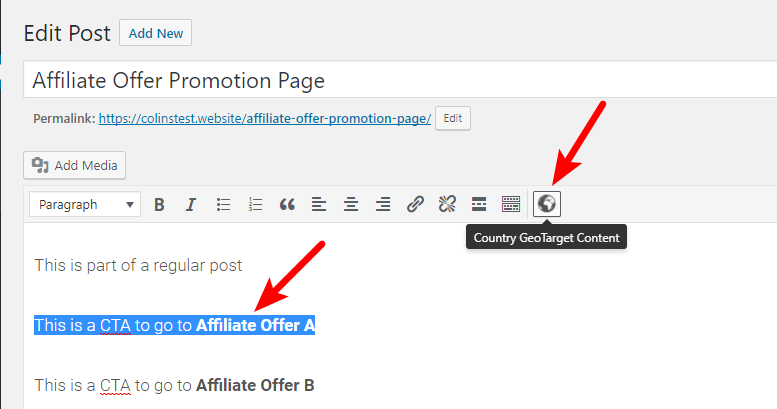
In the shortcode builder, choose the option for Never show content in and enter Vietnam. Then, click Insert Shortcode:
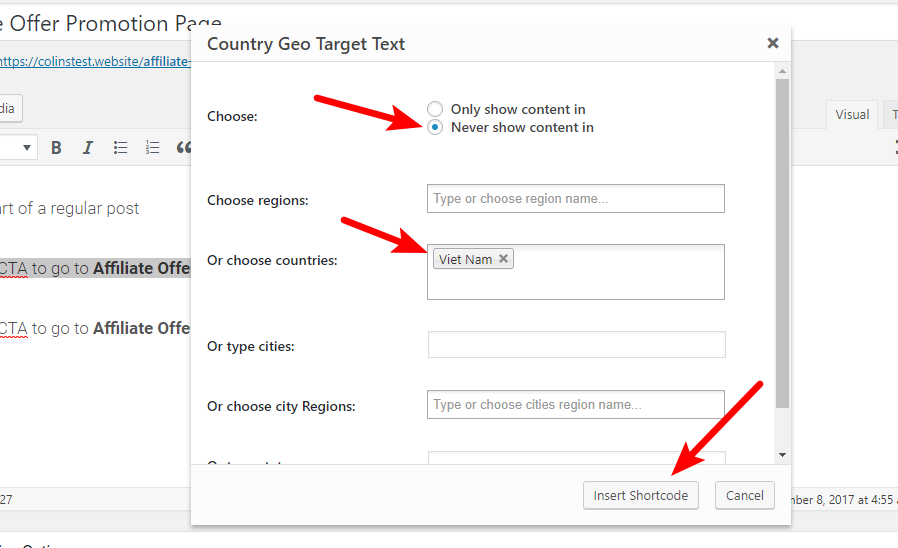
Then, repeat the process for your second affiliate offer. Only this time, select the option for Only show content in:
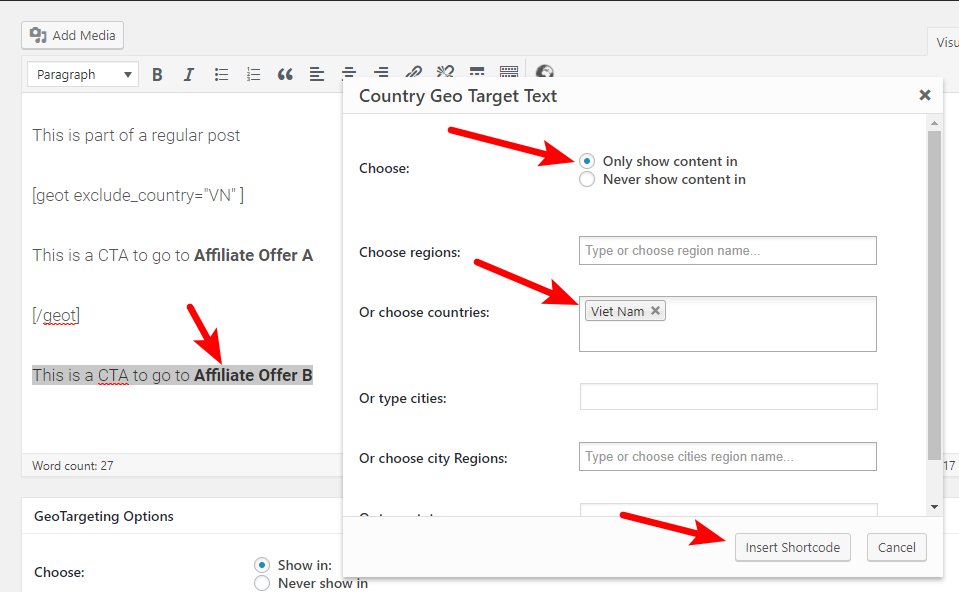
Now, publish your content like normal.
Visitors from Vietnam should see a CTA for Affiliate Offer B, while everyone else will see Affiliate Offer A.

If you want to more easily exclude whole groups of countries, you can also take advantage of Geotargeting WP’s Regions feature by going to the plugin’s Settings. And you can also use PHP functions to hard code this functionality into your theme.
How To Restrict Access To WordPress Content Based On Geolocation
Instead of showing different content based on a user’s geolocation, you might run into situations where you want to completely restrict access to certain WordPress content based on a user’s location.
Just as with the previous example, you can use Geotargeting WP to get this done.
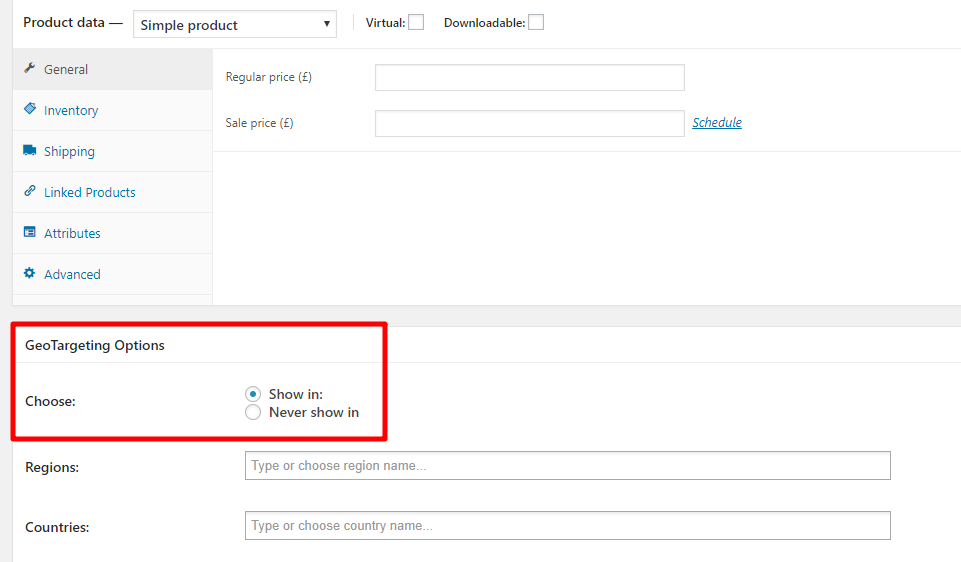
After installing and activating the plugin, look for the new GeoTargeting Options metabox underneath the regular WordPress text editor.
Then:
- Check the box for Never show in
- Select the locations you want to block access for by using the geolocation options
- Choose whether to Remove post from loop. If checked, users from the restricted locations won’t even see the post on your blog archive.
- Enter a message for users in restricted locations in the Show if user is not allowed to see content box
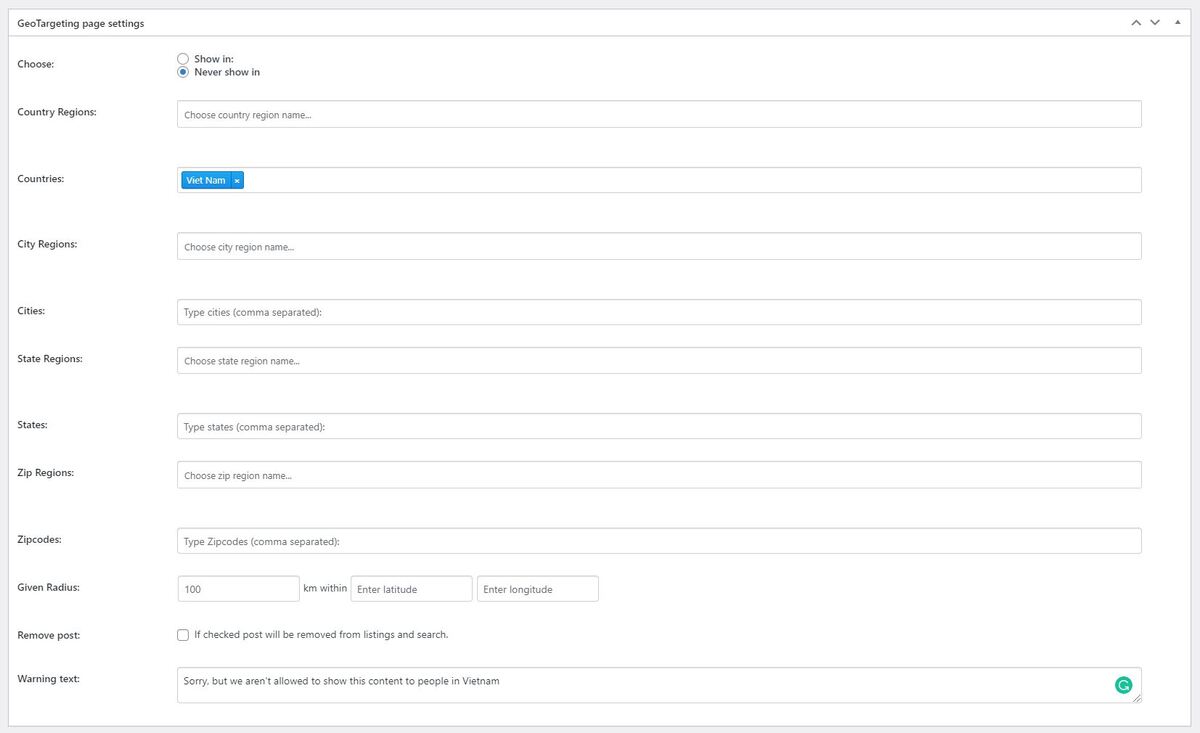
Per the example from above, anyone visiting from Vietnam will see the message that you specified:
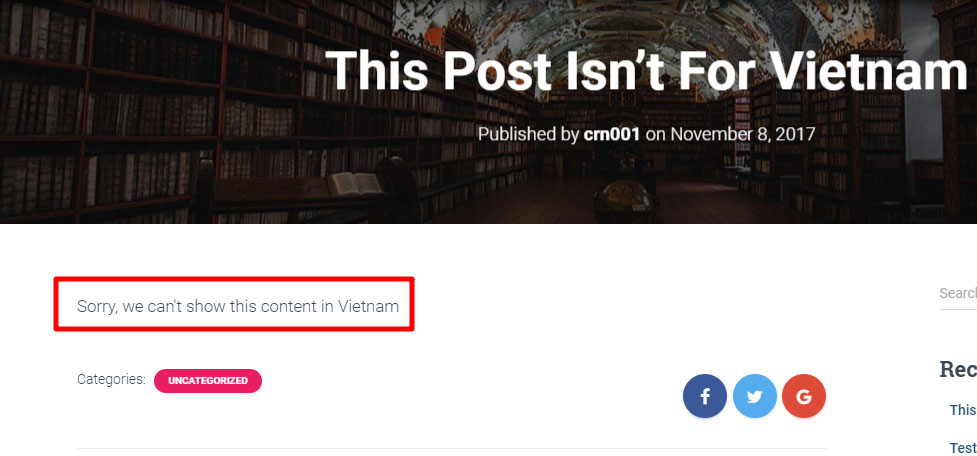
Everyone else will see your post like normal.
How To Restrict/Show Different WooCommerce or EDD Product Content Based On Geolocation
If you’re running an eCommerce store on WordPress, you might run into situations where some of your products aren’t available in certain countries or geographic areas. For that reason, you might want to either restrict access to a product or show a different description based on a user’s geolocation.
Geotargeting WP integrates with both WooCommerce and Easy Digital Downloads so that you can easily do this using a similar interface as the previous two tutorials.
You’ll be able to use both the:
- Geotargeting WP shortcode builder for your product descriptions
- GeoTargeting Options metabox for your entire product
How To Redirect WordPress Visitors To A Different Page Based On Geolocation
Finally, there are some situations where instead of showing different content on the same page, you might want to redirect visitors to an entirely different page depending on their geolocation.
This is helpful…
- If you have a multilingual WordPress website and want to automatically redirect visitors to the proper translation of your website.
- When you want to send visitors to a completely different landing page based on their geolocation.
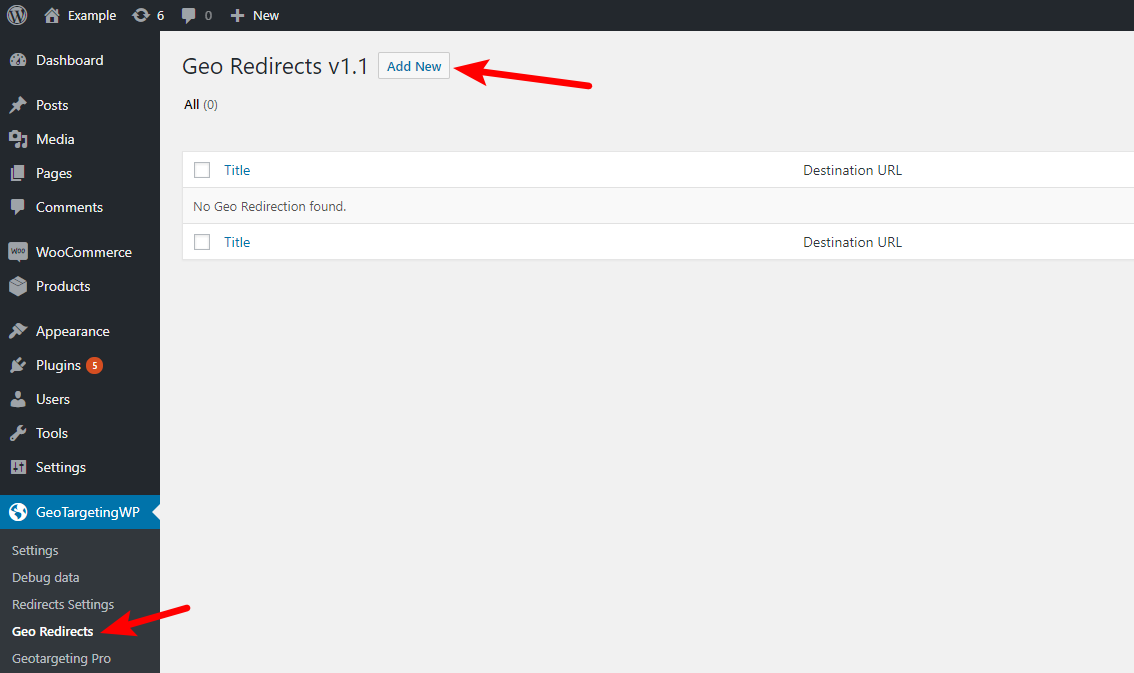
To redirect users to different pages based on geolocation, you can use the Geo Redirects for WordPress plugin in conjunction with Geotargeting WP.
Once you install and activate the plugin, go to GeoTargetingWP → Geo Redirects → Add New to create a new redirect rule:
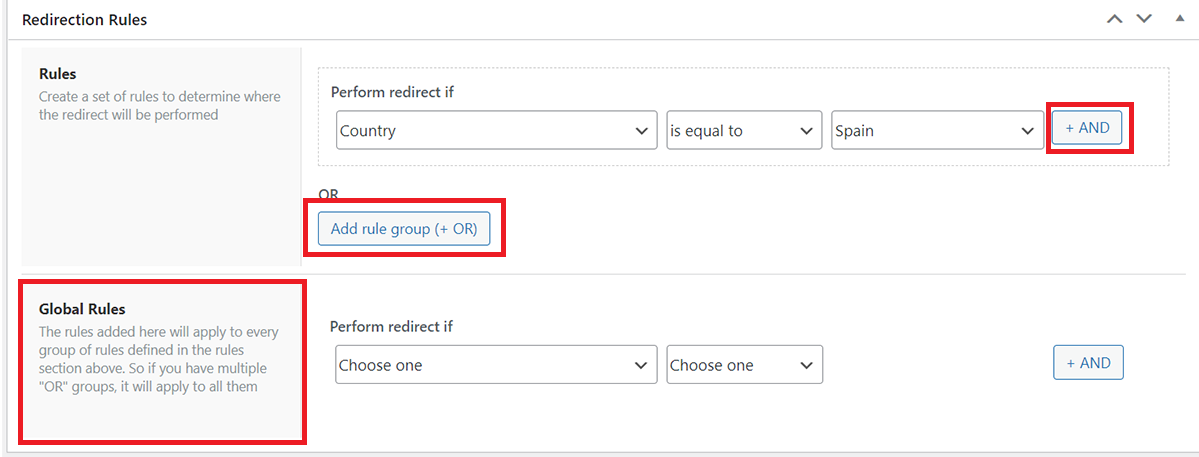
In the Redirection Rules box, choose what locations you’d like to trigger your redirect. Note that you can use both AND and OR conditions. And if you want to repeat a condition for all the rules you can create a global rule that will apply to every regular rule:
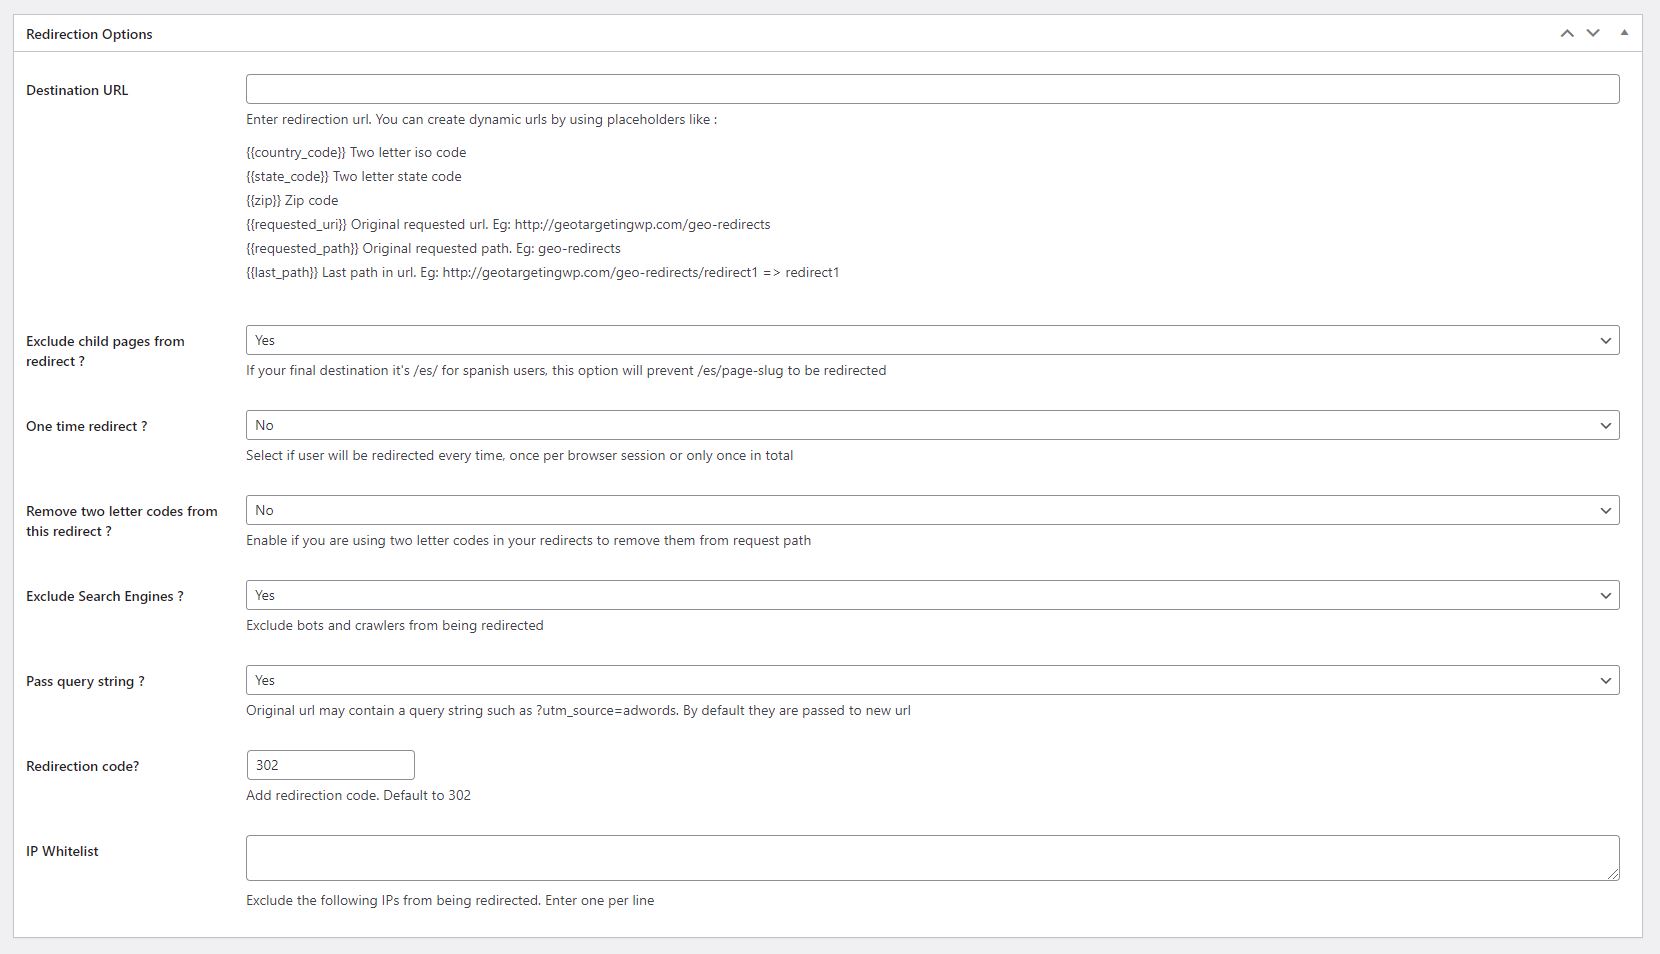
Once you’ve configured your Rules, scroll down to the Redirection Options to configure:
- Where to redirect users - note that you can use dynamic URLs (helpful if you have a multilingual website and want to redirect users to the same page on a different translation)
- How often to redirect users
- Whether or not to exclude search engines
- Which HTTP status code to use
- Whether or not to whitelist certain IPs from the redirect
Then, make sure to Publish your new rule.
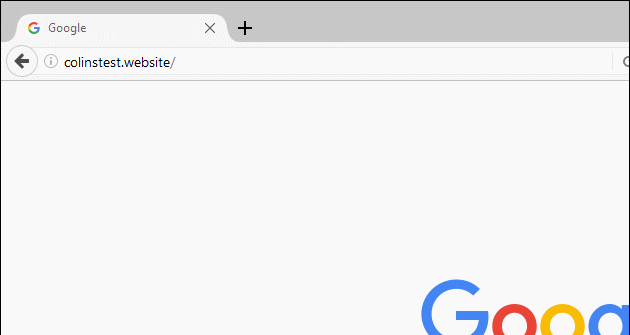
Per the example above, anyone from Vietnam should get redirected to the /dedicated-vietnam-landing-page/ page, no matter which page they originally visit:
Wrapping Things Up
And there you have it! Four different ways that you can customize WordPress content based on geolocation using Geotargeting WP.
If you want to learn more about the plugin, we encourage you to check out the product page for a full list of its features. And if you have any questions, don’t hesitate to leave a comment!
Powered by Froala Editor